Your cart is currently empty!
Here is how you can add font awesome icons to your WordPress menu item before of after any menu item. Adding items make website looks cool and amazing also it will be more user friendly.
Installation of Font Awesome Icons
Font Awesome release many version of fonts with latest icons packs Like Font Awesome 6, Font Awesome 5 but my favorite is Font Awesome 4.7 your can get it from here
Make sure your website has Font Awesome support available if not then you can use below methods to add support for font awesome.
HTML Method
Copy Below code and paste into website header file.
<link rel="stylesheet" href="https://stackpath.bootstrapcdn.com/font-awesome/4.7.0/css/font-awesome.min.css" crossorigin="anonymous">
Enqueue Method
Add below code in function.php file only for WordPress
function insertcart_com_scripts() {

wp_enqueue_style('font-awesome', 'stackpath.bootstrapcdn.com/font-awesome/4.7.0/css/font-awesome.min.css' );
}
add_action( 'wp_enqueue_scripts', 'insertcart_com_scripts' );
Adding Font Awesome Icons to Menu
Open Font Awesome icon website Here , Search or Find your Icon
![]()
Now click and open icon and copy icon code
![]()
After open your WordPress website Login to Dashboard > Appearance > Menu > Select menu item and Paste Font Awesome icon code in Navigation Label before of after name as shown in below screenshot and save menu
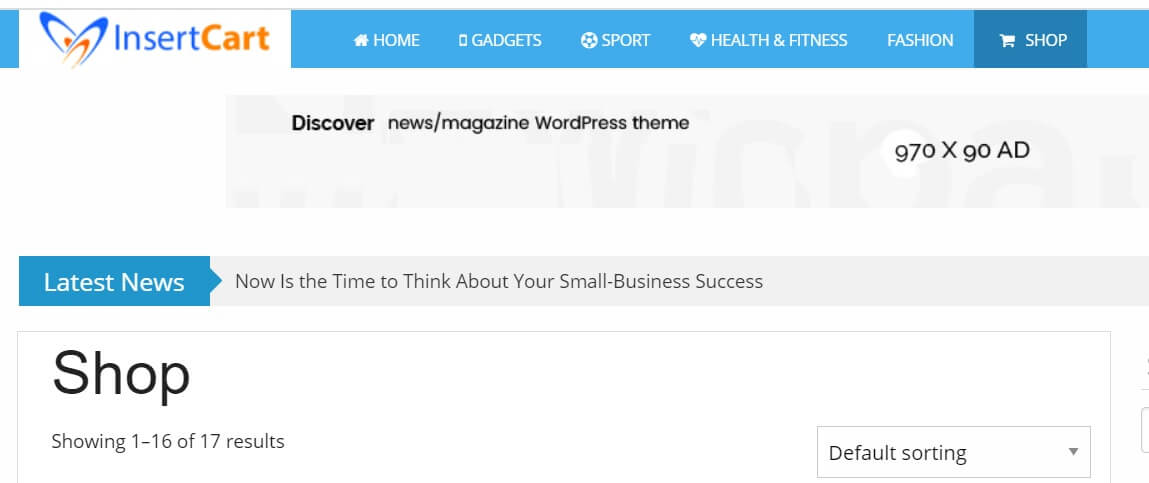
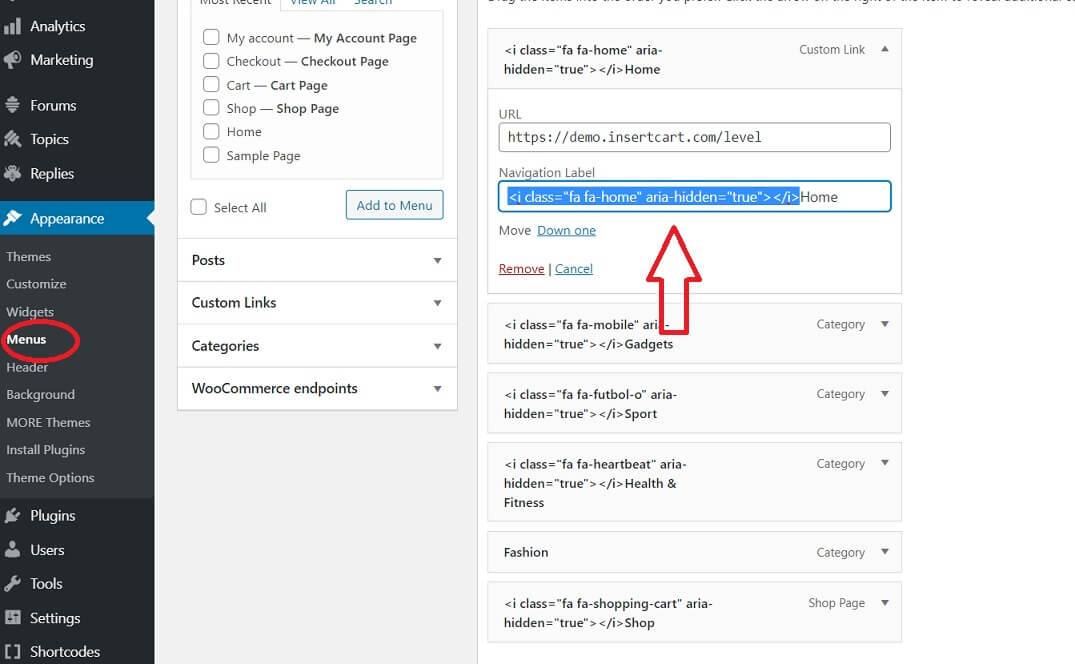 That’s all your icons will be displayed like below screenshot.
Comments
Grabber Pro
Original price was: $59.$39Current price is: $39.Custom WooCommerce Checkbox Ultimate
Original price was: $39.$19Current price is: $19.Android App for Your Website
Original price was: $49.$35Current price is: $35.Abnomize Pro
Original price was: $30.$24Current price is: $24.Medical Portfolio Pro
Original price was: $31.$24Current price is: $24.
Latest Posts
- How to Create a PHP Remote File Downloader with Live Progress Bar

- How to Connect AWS CloudFront URL with a Cloudflare Subdomain

- Android Developer Interview Questions Categorized by Topic

- When Data Must be Sanitized, Escaped, and Validated in WordPress

- Alternative to WordPress for High Traffic News Websites: Node.js & Other Scalable Solutions







Leave a Reply